Showing posts with label autumn. Show all posts
Thursday, November 1, 2012
Gnomeforest Silhouette
I've seen these amazing silhouettes / transparents on Pinterest.
All kinds, for all seasons and holidays.
And I've been wanting to have a go on one of my own.
This is what I've got so far, still need to add the colored transparent paper...
Please ignore the dirty table...
Love, Caroline
Tuesday, October 30, 2012
Needle Felted AutumnLady
As I showed in this post, we have a very nice nature table (well, it's actually on top of a cabinet, but never mind).
But there are still some things missing...
After I was satisfied with the rough base I made a dress by wrapping colored felt in brown and yellow around the base and needling it in place. After that I started adding details and hiding little "mistakes" (little spots where the base was showing through).

When that was done, I added hair and a braided hairband (just to keep the hair in place, since is didn't really turn out how I wanted it initially).
I also gave her a scarf of sorts, since autumn is chilly.. I was was a bit torn in two about the pumpkin, I liked the idea of a broom for sweeping leaves, but since I wanted the whole tning finished and I didn't feel like going out in the dark to search for twigs, I made a little pumpkin anyway... Looks cute though.
The whole doll had a bit of a medieval feel to it, which I like...
I have always had a thing for medieval stuff and fantasy figures....
She makes me think of lady Marian in Robin Hood, the old Robin Hood with Kevin Cosner *sigh*...

I think she looks rather lovely "under" our tree... Don't you think so too...
Oh yes, I really need to thank my colleague and friend Elisabeth, since she provided me with roving for the base and a couple of colors, so that I didn't have to do, and wait, for an order of roving!
Love, Caroline
But there are still some things missing...
I have always loved the nature tables an old friend of our had in her house, with loads of Waldorf-dolls she made herself.
I never got any further than sewing little gnomes from felt, with a pipecleaner base and wooden beads as a head, hands and feet. I've been making those since she tought me how to at the age of about 7, I think...
But when I got older and had already made a lot of them as gifts for grandma's and aunts, it wasn't fun anymore, so I stopped making them...
But since I started working in education, I always make nature / theme tables in my classroom and now that Joshua is getting bigger I want that in our home too. And not just with store bought decorations.
Since I learned sewing felt, I've also learned LOADS of other different crafts and needle felting is one Rebecca introduced me to.
So when I found these two amazing needle felted, Waldorf inspired dolls, I knew what I wanted to do...
After doing some research on how to get started, I combined this and this tutorial to make the base. I made the head and neck separately, as I was afraid the pipe cleaners would be visible. The head is very tightly felted, the body a little less tight and the skirt is very loosely felted. Only the underside is quite tightly done, to make it sturdy.
After I was satisfied with the rough base I made a dress by wrapping colored felt in brown and yellow around the base and needling it in place. After that I started adding details and hiding little "mistakes" (little spots where the base was showing through).

When that was done, I added hair and a braided hairband (just to keep the hair in place, since is didn't really turn out how I wanted it initially).
I also gave her a scarf of sorts, since autumn is chilly.. I was was a bit torn in two about the pumpkin, I liked the idea of a broom for sweeping leaves, but since I wanted the whole tning finished and I didn't feel like going out in the dark to search for twigs, I made a little pumpkin anyway... Looks cute though.
The whole doll had a bit of a medieval feel to it, which I like...
I have always had a thing for medieval stuff and fantasy figures....
She makes me think of lady Marian in Robin Hood, the old Robin Hood with Kevin Cosner *sigh*...

I think she looks rather lovely "under" our tree... Don't you think so too...
Oh yes, I really need to thank my colleague and friend Elisabeth, since she provided me with roving for the base and a couple of colors, so that I didn't have to do, and wait, for an order of roving!
Love, Caroline
Thursday, October 25, 2012
Crocheted Toadstools
I found these really cool Toadstools on Pinterest.
It's a pattern in Dutch, by GrietjeKarwietje and she has loads more Dutch patterns.
But since I tough myself how to crochet via English tutorials, I'm not familiar with Dutch crocheting terminology.
I had a bit of a hard time figuring out what to do, but when I got a hang of it, the toadstool was finished fast.
Only: It's lumpy and has bumps where I decreased stitches...
I also didn't like the fact that the underside of the hood is red, real toadstools have white(ish) undersides...
So I started another toadstool and made the base larger, crocheted the underside white and broader and finished he hood in red.

I'm happier with this one, but still: Lumps where the decreases are...
And since you crochet round after round, without joining a row with a slip stitch there is an awkward "dent" (can't find the right English word) where the white ends en the red starts.
After watching a Dutch video on YouTube, I figured out why I got lumps (Here is the English version). I didn't do the decreases the right way. That's what you get when you think you know how to do a stitch, deducing it from another stitch, but never actually look it up...
So I'm making another one.... Using what I know from crocheting Joshua's Owl-hat and applying that to this pattern.
I'm also trying to write out the pattern (using English crocheting terms, if anyone wants Dutch, let me know!).
That's it for now, I'll keep you updated on my Toadstool adventure!
Love, Caroline
It's a pattern in Dutch, by GrietjeKarwietje and she has loads more Dutch patterns.
But since I tough myself how to crochet via English tutorials, I'm not familiar with Dutch crocheting terminology.
I had a bit of a hard time figuring out what to do, but when I got a hang of it, the toadstool was finished fast.Only: It's lumpy and has bumps where I decreased stitches...
I also didn't like the fact that the underside of the hood is red, real toadstools have white(ish) undersides...
So I started another toadstool and made the base larger, crocheted the underside white and broader and finished he hood in red.

I'm happier with this one, but still: Lumps where the decreases are...
And since you crochet round after round, without joining a row with a slip stitch there is an awkward "dent" (can't find the right English word) where the white ends en the red starts.
After watching a Dutch video on YouTube, I figured out why I got lumps (Here is the English version). I didn't do the decreases the right way. That's what you get when you think you know how to do a stitch, deducing it from another stitch, but never actually look it up...
So I'm making another one.... Using what I know from crocheting Joshua's Owl-hat and applying that to this pattern.
I'm also trying to write out the pattern (using English crocheting terms, if anyone wants Dutch, let me know!).
That's it for now, I'll keep you updated on my Toadstool adventure!
Love, Caroline
Wednesday, October 24, 2012
Fall
I love autumn!
I love the colors
I love the shorter days
I love that those shorter days provide me with more time to burn candles
I love autumn produce
I love the falling leaves
I love the occasional summery day
I love the smell of the fresh rain
I love the shorter days
I love that those shorter days provide me with more time to burn candles
I love autumn produce
I love the falling leaves
I love the occasional summery day
I love the smell of the fresh rain
(There is also a lot about autumn I don't love, but hey, I'm opting for positivity!)
I also love to bring autumn in to our house.
So I went outside and picked up loads of leaves.
We have these shrubs in the green area's in our street, which have leaves that turn the most amazing colors in the fall.
I'm press-drying a load of them for a school project, but I did some crafts with a bunch of them.
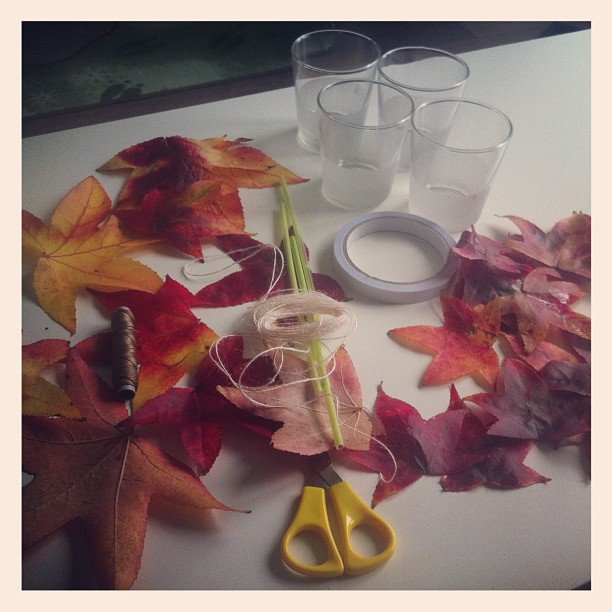
I made a garland by sticking pieces of drink straws to the back of the leaves with sticky tape. This way they hang nice and front facing when you string them.
I saw this on Pinterest, but can't find the original Pin anymore.
I also decorated some votives. Also found the idea on Pinterest.
They look so amazing when the candles are burning!

I think our nature/season table is nicely taking shape... The Loretta Grayson inspired tree fits in real nice!
I found the cute toadstool candle holders at Flying Tiger. Love that store...!

Now for some felted or crocheted toadstools and a felted harvestfairy (or something like that)...
Love, Caroline
Subscribe to:
Posts (Atom)