Showing posts with label creativity. Show all posts

Thursday, September 19, 2013

Bracelets

A month ago I went to Lowlands with my brother and two friends.
(more on that later!)

Lowlands had an Etsy-plaza with lots of cute stuff.
My female friend saw some really cool bracelets she looked in to buying.

I talked her out of it, because I knew how to make them.

Back home I got my supplies and made a couple.


I'm thinking of starting an Etsy-shop of my own, but I'm also looking into other ways to sell my crafty stuff...

For now: If you want one (or more) of these bracelets, contact me.
They're €2,50 a piece and you get a €0,50 a piece discount if you buy 3. 

Each one is unique, because of the button. You can pick which beads you'd like and the string-color.
Not limited to the three color's seen in the first picture, I have a HUGE stash of sting in LOADS of colors.
just let me know what you'd like..!

Love, Caroline


Saturday, August 10, 2013

LO Chase your wildest Dreams

Another lay-out with a picture from our vacation on Texel.
I created the arrow stamps from two small erasers.
The washi-tape is from Hema.


I have another LO ready, I just need to take pictures.

Love Caroline

Wednesday, August 7, 2013

More hats...

I'm trying to blog everything I've created but neglected to post.
Today two hats...

A puppydog hat for a friend's son. Joshua is modeling it...


And a Minionhat for my crazy "little" brother. He actually wears this to work, he does electrics on new builds, which is really chilly during winter...


Love, Caroline

Tuesday, July 30, 2013

LO Headspace

It's the 4th week of summervacation and I finally cleared my head of all the unnessecary junk that was floating around in it. It gave me the peace I needed to do some scrapbooking for the first time in a little less than 2 years... Pretty proud of the result...

These are pictures of our holiday on the beautiful island Texel. More coming!


Love, Caroline

Thursday, November 1, 2012

Gnomeforest Silhouette


I've seen these amazing silhouettes / transparents on Pinterest.
All kinds, for all seasons and holidays.

And I've been wanting to have a go on one of my own.
This is what I've got so far, still need to add the colored transparent paper...

Please ignore the dirty table...

Love, Caroline

Wednesday, October 24, 2012

Fall

I love autumn!

I love the colors
I love the shorter days
I love that those shorter days provide me with more time to burn candles
I love autumn produce
I love the falling leaves
I love the occasional summery day
I love the smell of the fresh rain

(There is also a lot about autumn I don't love, but hey, I'm opting for positivity!)

I also love to bring autumn in to our house.
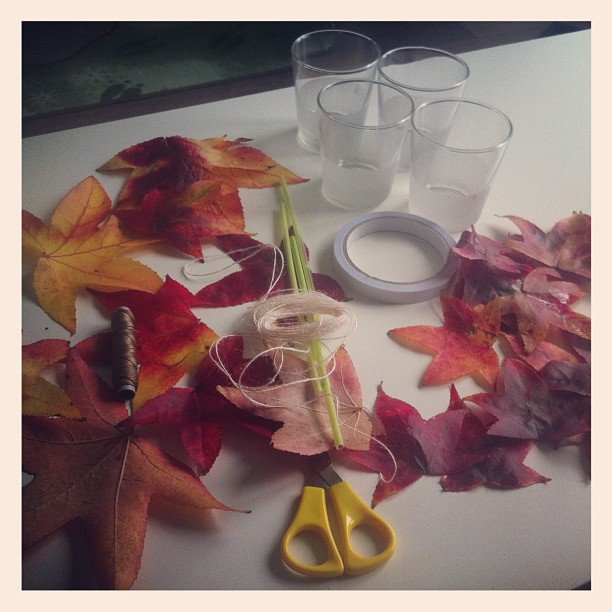
So I went outside and picked up loads of leaves.
We have these shrubs in the green area's in our street, which have leaves that turn the most amazing colors in the fall.
I'm press-drying a load of them for a school project, but I did some crafts with a bunch of them.


I made a garland by sticking pieces of drink straws to the back of the leaves with sticky tape. This way they hang nice and front facing when you string them.
I saw this on Pinterest, but can't find the original Pin anymore.


I also decorated some votives. Also found the idea on Pinterest.
They look so amazing when the candles are burning!


I think our nature/season table is nicely taking shape... The Loretta Grayson inspired tree fits in real nice!
I found the cute toadstool candle holders at Flying Tiger. Love that store...!


Now for some felted or crocheted toadstools and a felted harvestfairy (or something like that)...

Love, Caroline

Sunday, September 30, 2012

Spring Cleaning III & some Sewing

A small update on the office/guestroom.

I actually can see the floor again!
Threw a lot out, or put it in boxes. Where it belonged..!
And I have a little desk space, which is currently filled (again) with my sewing machine.

Finally got the sewing machine back to work, the thread kept breaking, but I fixed it... Yay me!

This is what I made.

Finally, no more searching for my crochet needles or a scissor.
Found the tutorial on Pinterest.

The flowerfabric is a scrap of Tilda I had left from the bedspread, the white is IKEA, also left over from the bedspread...

Love, Caroline

Thursday, August 16, 2012

Party Planning

In just two weeks our little man is turning one...! This first year has gone super fast and we've experienced so many milestones already...

For his first birthday I'm throwing Joshua a Whale / Under the Sea Party. He probably won't remember it when he is older, but I just love the idea of a themed party.
I'm trying to not make it too over the top, but I did start searching for idea's on Pinterest a long time ago and created a "Whale Party Idea's" board.

The invitations have been sent, but I won't show them, because I altered something that's sort of copyrighted.

Here are the idea's I'm using or thinking of using...


These lanterns are sooooo simple and effective. I've bought two cheap white ones to hang in the garden (if its dry when we are having the party...


If I can find the time and energy to whip out the sewing-machine, I want to try if this actually works.
The only problem is, in Holland you can't buy rolls of streamers. Just the wedding ones, so I'll have to try it with strips of regular crepe-paper.


I'm making a cake inspired on this one. The bottom one will be a paisley-shape and the top one just a simple round one, as that one will be Joshua's smash-cake...!

Source: etsy.com via Caroline on Pinterest

These will go on top of the cupcakes Joshua will treat at daycare. I'm thinking of sticking on white sugar confetti for the eyes, instead of just a black dot with edible ink...

Source: etsy.com via Caroline on Pinterest

This shouldn't be too hard to make. I'm trying to decide between doing a onesie or a t-shirt. The whale will be felt, since that is easy to cut and hand-sew.

Source: etsy.com via Caroline on Pinterest

Not sure Joshua will keep something like this on his head, but it'll look soooooo cute... Haven't decided if I'm actually going to do this.

As for the party-food, I WON'T be serving anything fishy, since that goes against my principles.
I'm making some simple sandwiches, probably vegetarian.

These also look really good:

Spinach, feta and mozzarella stuffed in cresent-rolls.

And these are just too cute and fishy...

But I don't have a small fish cookie-cutter and I don't know if I can find the time to make one...

If you want to see more of what I pinned, check the board, linked at the top of this post (if you haven't already)

Love,

Caroline

Tuesday, July 24, 2012

PIF

I came across this topic on a couple of blogs I read.

PIF...
..
..
PIF?
..
..
PIF stands for Pay It Forward... Now that rings a bell...!

Remember the movie?
The idea is that you do something selfless for someone. That someone may in turn be inspired to do something selfless for someone else (or multiple someones...)

So when Rebekka asked if any of her readers was interested in a PIF, I didn't hesitate to respond...

Today I visited Rebekka (more on that in another blogpost) and I got my PIF...!
It is sooooooo gorgeous!
Rebekka knows we (Andries and I) love everything Whale and we love whaley-stuff for Joshua.
I could have guessed I would get a Whaley-PIF...


She made a Marble-bag with an embroidered whale. Inside was a felt whale which I can add to a shirt, bag or make a brooch from, a whale stamp, a stuffed whale (which Joshua LOVES! ! !) and a really cute small whale pin...

So now it's my turn to Pay It Forward...!
If there is anyone who is interested in receiving a small PIFpackage, let me know!
You don't have to have a blog to enter... You just have to like receiving a small gift and be open to the idea of maybe Paying It Forward...!

Love, Caroline


Sunday, May 13, 2012

Loretta Grayson

I feel like such a copycat...

I while ago I came across this pin. After clicking and clicking and clicking some more I endend up on Loretta Graysons blog.
All those colors made me sooooo happy... I also found her "tutorial", which show het process of creating her artworks. 

I originally wanted to create something similar with scrapbookpapers, but since my craftroom is such a mess (I'm not even close to finishing the reorganisation) and I didn't want to make a huge mess on our dinnertable, I decided to try out my Derwent pencils on canvas.
So I made a sketch and started coloring...

I blended every block with white spirit, so fill the canvas and make the colors more vibrant. I think I succeeded pretty well...

I did fill the trunk and the branches of the tree with black acrylic paint. First the whole thing with just black and after that dried, I applied different shades of grey.

When those layers dried I did the bark like Loretta does, with a very thin brush I made sort of circular patterns...
I'm still trying to figure out how I can create a bit of a grungy rim around the outside of the circle, without ruining the pencilwork.
I'm thinking of trying watercolor on a testpiece...
This week I need to buy some goldpaint for the "star"details.
I thought af adding the stars by glueing rhinestones on, but that'll probably be to much.
I'll be doing a combination of both...

So... Not the whole "artwork" is copied, but I still feel like a copycat...

Love, Caroline

Friday, April 27, 2012

Spring Cleaning

Well, not really cleaning, it's more organizing and clearing out...

We live in a 3 bedroom, 2 storey familyhome. We don't have an attic.
Before Joshua was born we used the middle bedroom as our "office/craftspace/library" (I'm a huge childrensbookfan). The smallest bedroom was used as our attic, to store all kinds of stuff we didn't use often.
The room was filled to the brim, you could only open the door and take one step inside, the rest of the floorspace was filled up.

When I found out I was pregnant, we started clearing out our "attic". We filled a large container with waste and brought LOADS of stuff to the thriftstore.
Things we really wanted to keep found a new "home" in the officebedroom and in the cabinets my dad proudly built above our stairs (we now call those our attic).

I never expected to accumulate sooooo much babystuff and toys in such a short time, Joshua is just 8 months old.... And we really don't buy much things, because I really DON'T want to spoil him...
We started organizing our livingroom and needed to clear some thing out. "Just store it in the office, until we find a better place." is a phrase heard often in our home...
With the result that our office is completely filled up with clutter...

So yesterday I started organizing and clearing out.
Three weeks ago my mom helped me to put all my schoolpapers in the right files. So I would have some space in the bookcases.
Last week we went to Ikea to buy plastic containers to store craftsupplies in and to put Joshua's clothes (which are too small already) in. The clothescontainers will be stored on my moms attic.
(Thanks mom! I tried to not keep too much... Just "special" stuff...)

I've already put lots of stuff on Marktplaats (dutch E-bay), take a look if there's anything you might be interested in?
I'll probably be adding more...

Here is a before picture... (I'm really embarrased to show this...)


The after picture is coming, I hope soon...!

Love, Caroline

Tuesday, March 27, 2012

LeafGarland Tutorial

First off: I'm going to mention someone is this blogpost whom I have mentioned a lot...
I guess it's because we have so many common interests.
We share a lot of the same hobbies and the same idea's.

As with this one...

About a year ago, Rebecca created this tree. I had seen similar trees around the web, but in my opinion, they were all waaaaay to expensive.
So I asked Rebecca for the pattern. It had been tucked away safely in my agenda, but a couple of weeks ago, I finally found the time (and peace of mind, busy, busy, busy) to trace it and ask hubby to cut it out for me.

So while it was dark outside, he sawed away in out kitchen...
To be honest, we do a lot of DIYing in our kitchen during the darker evenings of the year.
Our shed is just to cramped and cold and we have a very patient vacuum cleaner.

So the tree has proudly been standing on the cabinet in our livingroom.

But with Spring coming and leaves starting to grow, I wanted a little decoration for my little tree.
That's when I thought of a leafy garland and made a tutorial as I went along...
Here it comes:
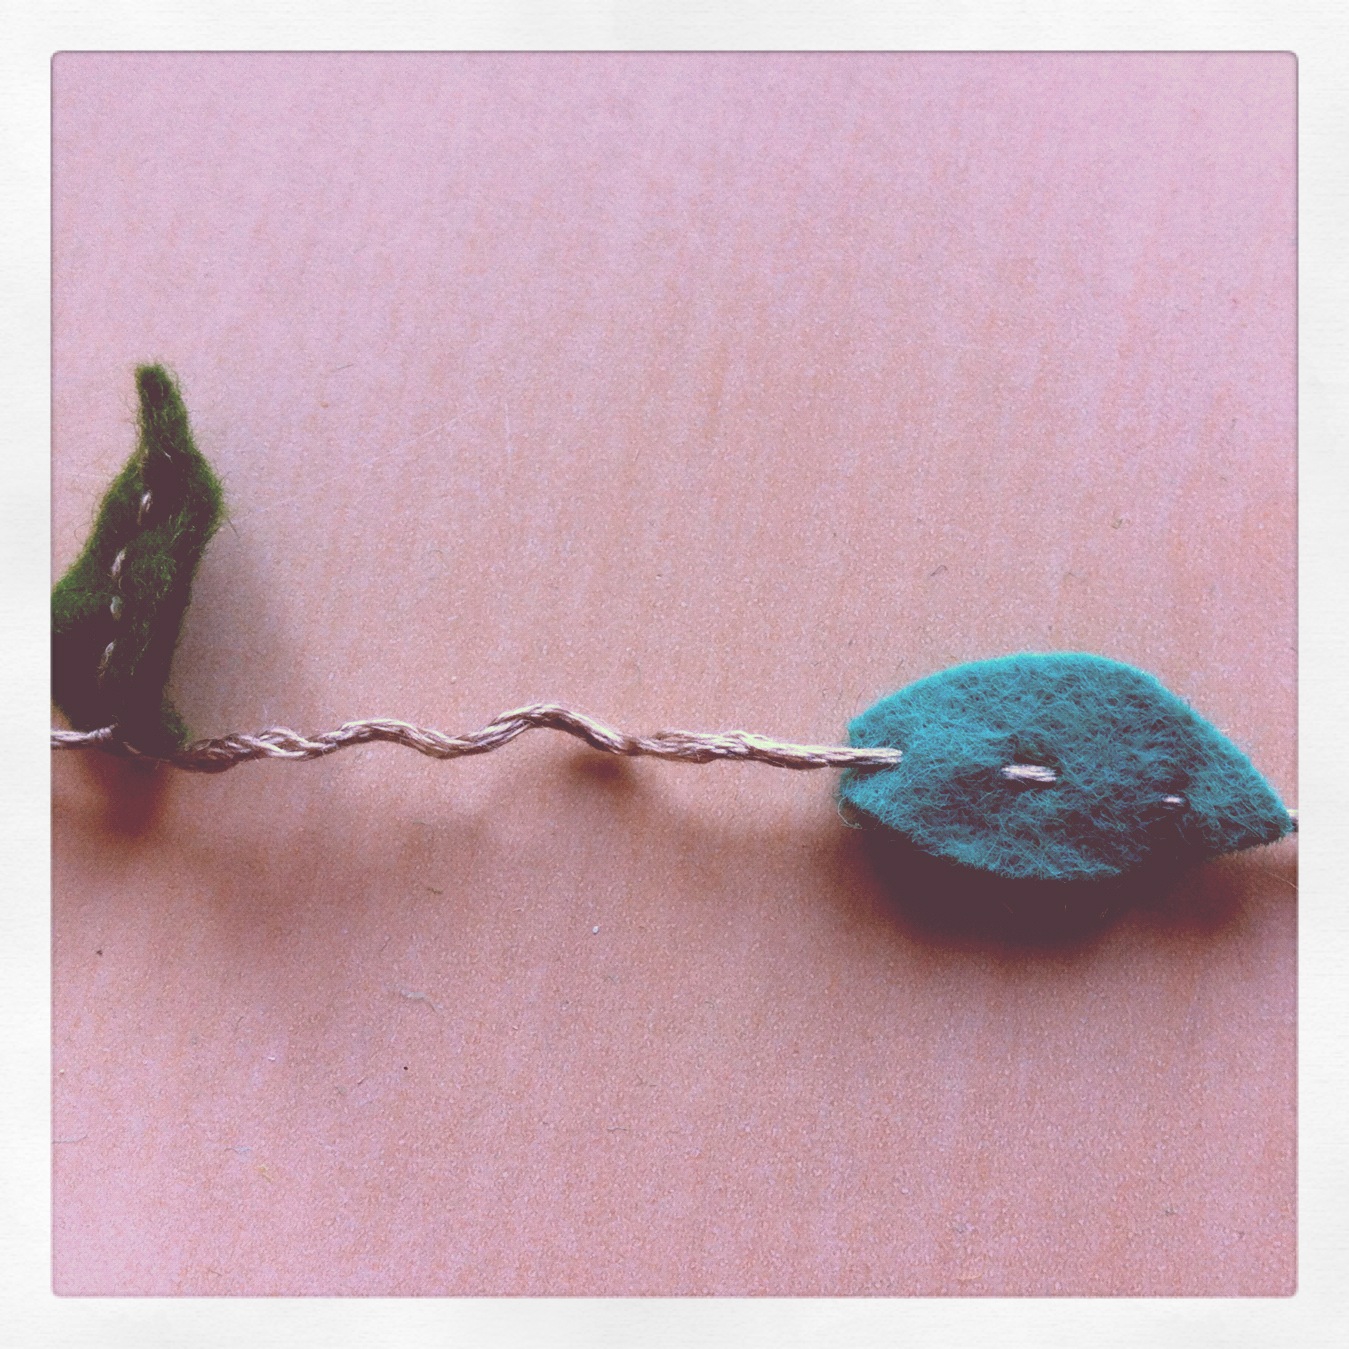
1. Cut some leaves from green felt. Mine are about 2cm long.

2. Pick a thread to stitch them on. I used DMC
embroidering thread in a color similar to the color of my wood.
3. Stitch the thread throught one of the leaves
and slide it to about 5cm from the end of the thread.
4. Stitch the tread back through the leaf.
Tie a knot in the thread, so the leaf hangs down.
5. Stitch through the next leaf and slide it
to where you want it on the thread.
I spaced them about 5 to 7cm a part.
Repeat step 4 and 5,
 untill al the leaves are stitched onto the tread.
6. Weave the garland in to the tree and VOILA... A Spring-y tree...
Love, Caroline

Sunday, March 11, 2012

Felt Party

A while ago Rebekka asked me if I was interested in going to a felting workshop, which would cost about 60euro's. I told her I'd love to, but only if finances allowed me to.
Well, I didn't even have to wait and see, because a couple of days later she asked me if I was interested in doing a workshop at her place, with a couple of her friends (and our colleague Elisabeth), which would cost 10euro's.... Guess what I told her? YES!
So I got invited to a "felt party".

We were all asked if we could bring something for lunch and she would provide the materials and teach us a couple of techniques.

So I went over on a Saturday, with a leak and cheese pie (recipe coming soon!).

Rebekka ordered loads of goodies at Meervilt.


We got started with wetfelting a ball. We felted around a foam stressball, so we had something substantial to start with.
I made a marbeled ball, on which I needlefelted stars after it dried.

After lunch, Rebekka taught us how to needlefelt.
I made a whale, ofcourse...


This is what we made during the day:

We divided the remaining materials between the 6 of us, so could make some more projects at home.
I already felted a little mouse...

Love, Caroline

PS: I shamelessly borrowed most of the pictures from Rebekka's blog...
Here's the link: Click

Friday, March 9, 2012

Ribbon Storage

I found this idea on Pinterest.
Storage for extra cables and that gave me a "lightbulb-moment"...

I can soooooo do this for ribbonstorage, or actually, to organise my ribbonstorage.

So I rummaged around for some cardboard and tape and a pile of toiletrolls.
This is the result:


The top layer is nicely sorted, and when you take out the tray, there are rolls and bags, which were already nice and neat... I'm a very happy lady...!

Love,

Caroline

(PS: the next blogpost is already in the making, but my babyboy is crying upstair, so you can probably guess what has my priority...! ;-P)